
This is a quick instruction on how you can filter anything you want in Divi.
It shows you how you can create a:
- Filterable portfolio with own modules
- Filterable video gallery
- Filterable gallery
- How you can filter every Divi module.
Video Tutorial
1. Download the plugin
The first step is to download the free Divi Filter plugin here: Download
2. Upload and activate the plugin
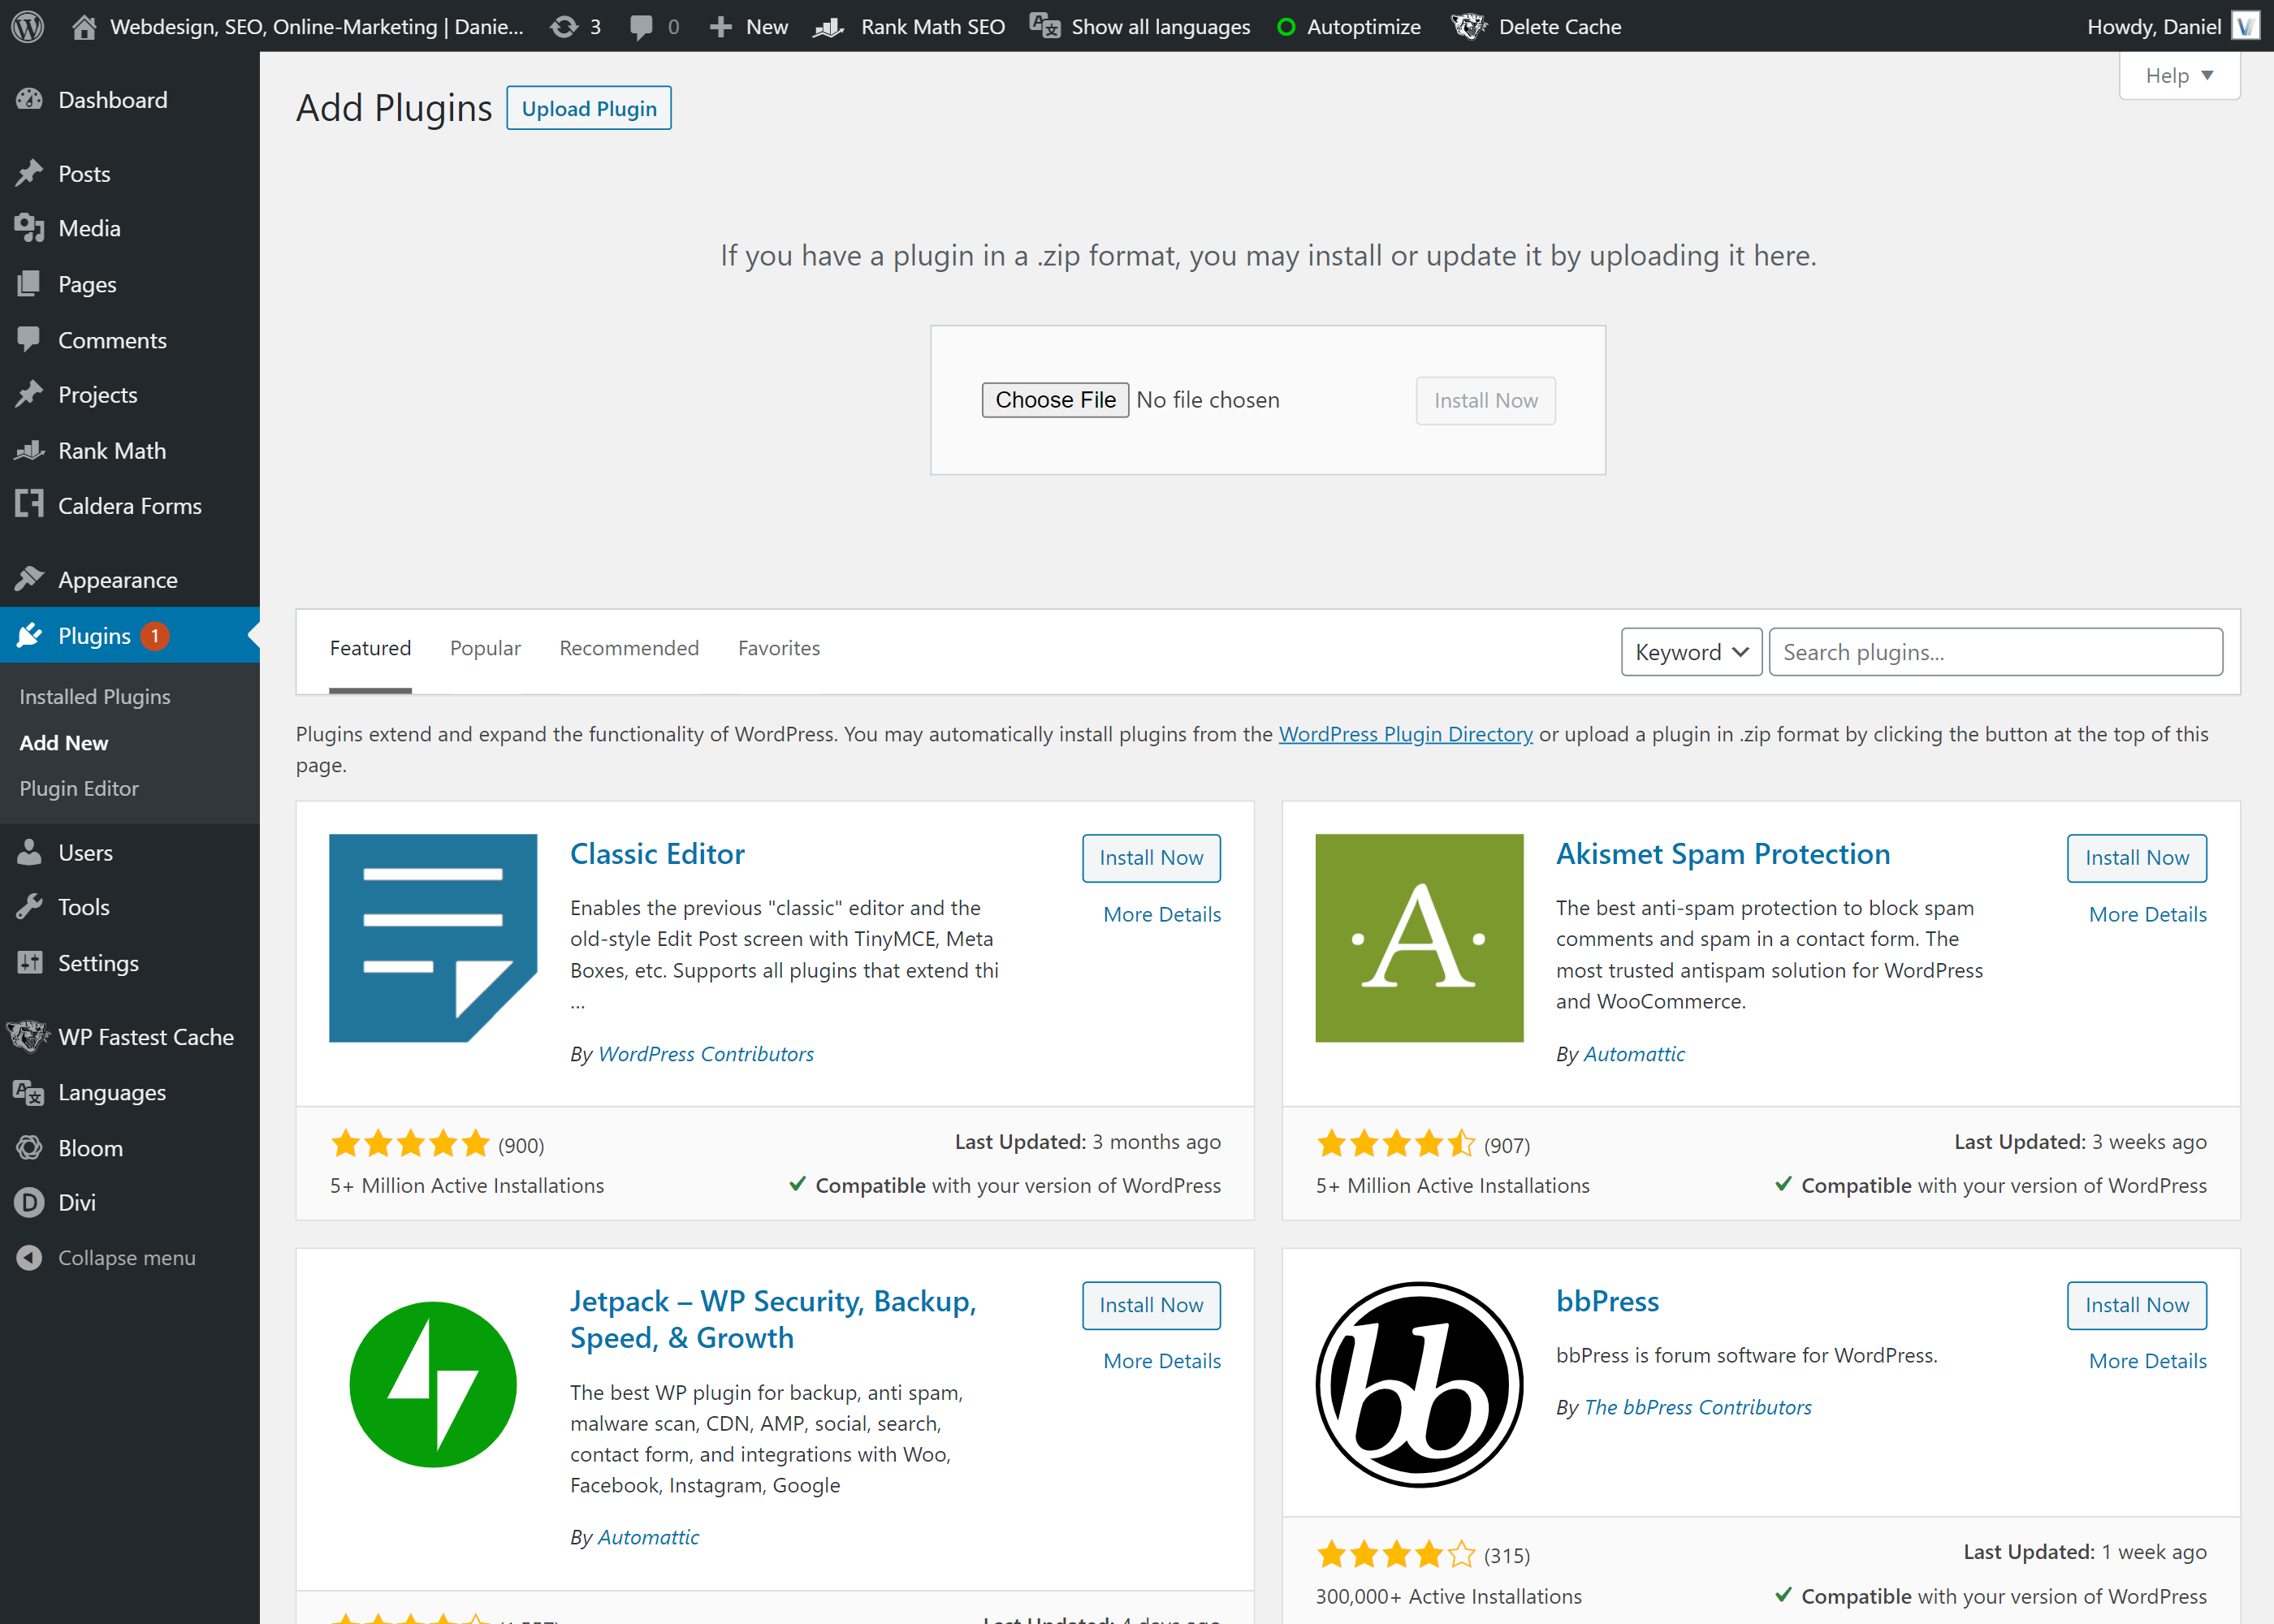
In your WordPress dashboard, you click on Plugins → Add New → Upload Plugin and choose the divifilter.zip file. Afterwards you go to Installed Plugins and activate it.
3. Create or open a page with the Divi Builder
If you already have a page, with a layout that you want to filter you can open that. Otherwise, create a new page and open it with the Divi Builder.
4. Create a section with buttons
Create a section for the filter buttons.

5. Add classes to button
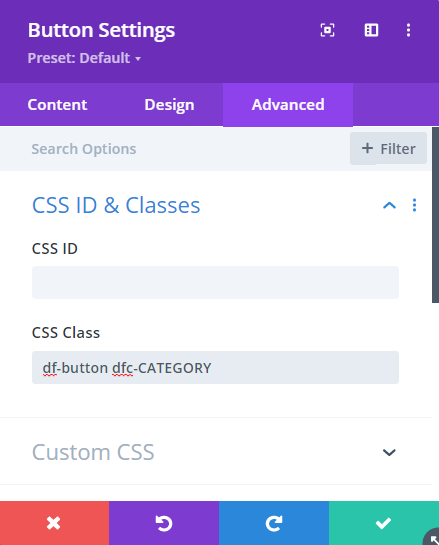
Open the button settings and add the df-button class to each button module. You also add dfc-CATEGORY for each category you want to filter.
If you don’t add any dfc-CATEGORY class, then all elements will be shown.
6. Create another section and add class
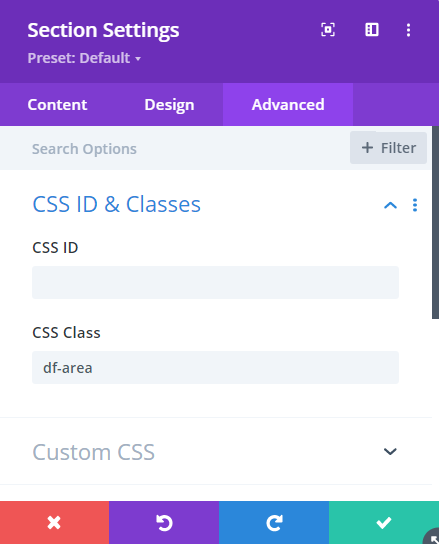
Create a new section for the filterable elements and add the df-area class to it.
7. Create modules you want to filter
Create rows and add your modules you want to filter into the columns.
Only the columns will be filtered, so make sure to add one filter element into one column.
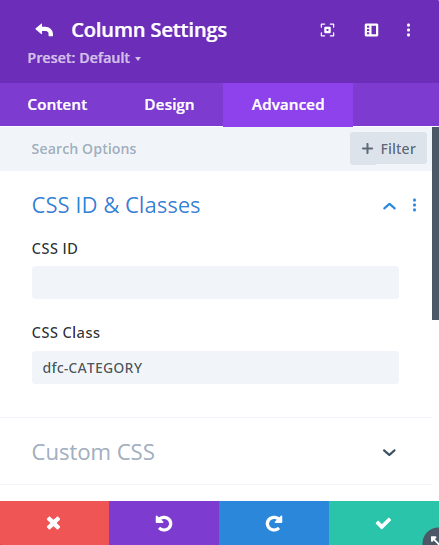
8. Add classes to columns
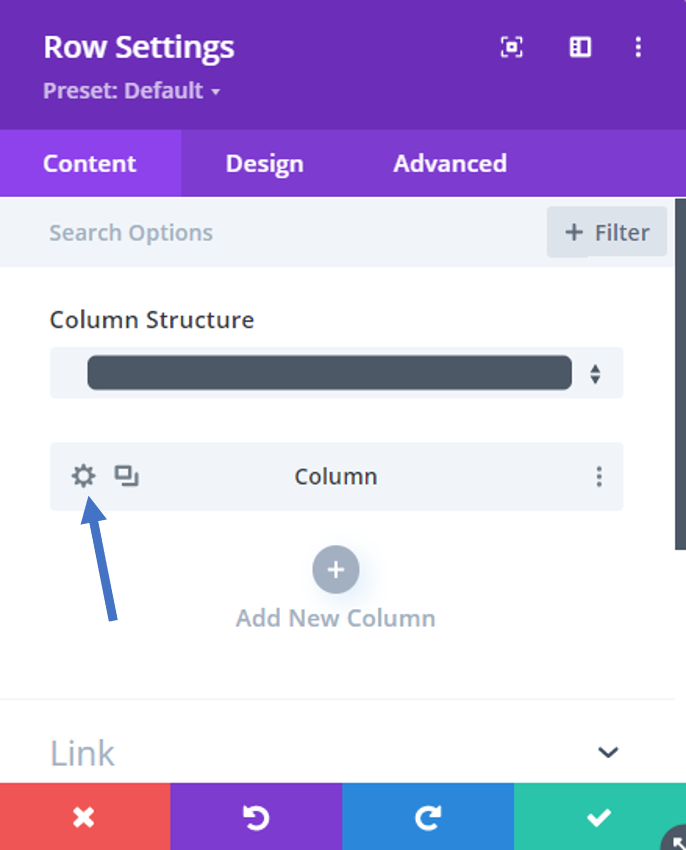
Open the row settings and then click on the gear icon to access the column settings.
Here you add the dfc-CATEGORY class, that you want the element in that column to show up for.
Now everything is set up. If you now click a button e.g. with dfc-CATEGORY1 then only columns, with this class will be shown. All others will be hidden.


Good morning Daniel. First thank you for your plugin is awesome. I have a question and I would like it if you could help me. I want my home page to look like this, with category buttons and below them. Do I have to build anyway with the theme builder or can I do it directly from the created page. I don’t know if I explained myself well enough. I repeat, thank you very much
You can do it directly from the page with the Divi page builder. 🙂
Cool Daniel, very simple.
I’m making my filterable gallery images and I came cross navigation between images with lightbox opened. How can I navigate from one image or category into another?
Hi Alexandre, thanks for your feedback. Unfortunately, this is not possible with single image modules. It would be possible if you filter gallery modules though. Then you can switch between images. 🙂
Thanks Daniel. Another question: how can I change active mode style of df-button?
For that, you just define a styling for the df-activebutton.
Here is the full documentation: https://docs.danielvoelk.de/styling/style-active-button-premium
You need the Premium license for that functionality to work.
Hello Daniel, Is it possible to arrange all the elements horizontally – next to each other? Buttons next to filter results? The solution you propose is quite interesting, but even with the premium version I cannot arrange the selection buttons next to the results. And I need it very much. On the left, a selection – on the right, the result. Not like now, choice at the top, the result at the bottom. Could you give me a hint?
Yes, you can use the specialty section for that and filter it with the Divi Filter. 🙂
I made a quick demo: https://demos.danielvoelk.de/specialty/
Thank you! I’m starting tests!
Everything works just like you wrote Daniel. Thank you. I would be grateful if you could tell me how to make an orange module for the buttons and the 4 columns on the right for the results in special circuits?
Just use that one and add a row with 4 columns. Is that what you mean?
Hi Daniel,
Is it possible to have 8+ categories (filterbuttons) with a row with 3 columns (like the design in your youtube tutorial)?
Yes, sure 🙂
Hi Daniel,
Is it possible to use the premium as a sorting method instead of filters, and have it as drop downs like the listing layout example?
Unfortunately not yet.. right now it’s only possible to filter.
Do you have any recommendation on how I can sort my filtered columns, I need price max – min and min – max. Any reccomendation on how to do this?
Thank you for your plugin,. It seems to be a very good solution for me however I have additional question. Is it possible to set up an activ button? I mean when you click on button “category 1” this button for example changed color?
Yes, this is possible with the Premium version 🙂
You can get it here: https://shop.danielvoelk.de/
Thank you for your answer. In premium version I see” multiple filter” What limit is in free version ? And limit is on the number of filter cathegory? And What does it mean option „different modes”?
Multiple filters means you can have multiple filters on one page. In the free version you can only have 1 per page
Different modes means you can have for example multiple buttons active at the same time and show the results of both categories. 🙂
ok, I understand. I have the last question. Is it possible to get pagination buttons when you have many columns to filter?
Unfortunately not yet, you need to set the number of blog posts to something high so you don’t have other pages.
Is it possible in premium version to set up a text module which will appear only in specific category( without „all”)? For example, I have category „all animals” „cat” and „dogs” and I would like to have a text „lorem ipsum” when you click on the „cat button” however when i click „all” this txt shoul disappear .
P.S. Could you also answer the question above about pagination buttons ?
Hi Monika,
you could make the all elements a class. And then you assign that class to everything except the text. 🙂
When you click on all everything shows except that. And when you click on cat, only the cat columns show. Of course columns can have the all and text class 🙂
Thank you for your reply David:) However, when I make a class, and then assign that class to everything except the text. The text has default settings and it shows in “all” (df-button). I would like to get this text only in specyfic category (not when I click the “all”)
You basically create a new class dfc-all for that.
You don’t use the normal all button (just df-button)
You can also name the class dfc-all2
Whatever you want 🙂
ok, thank you ! I will try
Sorry for my many question.. I would like to ask about one more thing. I read in documentation that I can set up URL like this https://demos.danielvoelk.de/ice-cream/?filter=stick However, is it possible to create custom URL? Or only in that one way?
Only in that way with ?filter=stick
But you can use a redirect plugin, to use for example ?test=2 and then redirect it to ?filter=stick.
Or use ice-cream/stick and redirect it to: ice-cream/?filter=stick 🙂
Yes, but not without you adding the classes. You can filter for example for months, if you add the month classes to your elements. 🙂
Thanks for the incredibly fast response. Excuse my ignorance since i’m not a developer/programmer, to which elements should I add the classes? lets say i have a blog which i’m already filtering by categories, how could i filter it by date too?
hello! any idea? thanks in advance
The df-activebutton doesn’t work : I install the Pro version on my website – but the “df-activebutton” dont appears when I click on one button (I can see this when I inspect the element – when I do the same check on your exemple with the Icecream I can see that class on the selected button). Is there something else to add to make it working ?
Did you input the license key? 🙂
https://docs.danielvoelk.de/gettings-started/get-the-premium-features
Hello! Thank you for the plugin, it is really helpful. I would like to know if it is possible to make a dropdown filter instead of buttons?
Yes, that’s possible: https://demos.danielvoelk.de/listing-layout/
With the Premium version, you get that layout to easily import: https://shop.danielvoelk.de/
Thank you very much! I have to buy the Premium version and then the listing layout (https://demos.danielvoelk.de/listing-layout/)? Or is there a documentation about how to implement it ?
The listing layout is included in the Premium version. 🙂
You can find a video here: https://docs.danielvoelk.de/layouts/import-layouts
Hi, I’m trying to implement the same with a dropdown filter. I have my layout as I like it already so dont want to import your layout. I cant see any documentation about how to enable dropdowns?
You can’t enable it. It’s custom JS and CSS. The easiest way to use it with dropdowns, is to import the listing layout. 🙂
Included with every Premium version: https://shop.danielvoelk.de/
Hi, is it possible to filter items, like many div’s, inside a custom code module?
You can filter whole blog modules, but unfortunately not the div’s inside the code module.
Hello Daniel, thank you for this plugin! I like the simple and straightforward approach. I would like to know if it is possible to display no content instead of everything when you first access a page and have to click a button to reveal the filtered content (I’m using the free version).
Hi Mary, you can achieve something like that, unfortunately only with the Premium version: https://shop.danielvoelk.de/
Hi Daniel! I’m trying to add filtering to a specialty section with the buttons on the left and the filtered columns on the right, but the filters aren’t functioning. I have added CSS Classes to all buttons and added the df-area class to the column 2 CSS class in the specialty section. Is this a feature of the premium plugin, or do I need to add the filtering class elsewhere?
Thanks in advance!
Hi Erika, yes this is a Premium feature: https://docs.danielvoelk.de/functional/filter-specialty-sections-premium
You can get a Premium license here: https://shop.danielvoelk.de/
Hello, is it possible to use this with custom post types? I’m using ACF and my CPT has its own categories not located within the regular “posts”. Is it possible to be able to filter by their custom taxonomies? I tried with the regular blog module, but I think it’s looking for categories from the regular posts. The current blog module doesn’t allow me to add categories when I’m using a CPT. Would I be able to use this in conjunction with a custom blog module? I’m not sure what to do. Thanks!
Unfortunately this is not yet possible, but it could be added. Please send me an URL to my e-mail address and I take a look 🙂
I have multiple rows for different posts, how do you hide the other rows and just show the All one when you do a hard refresh on the page?
You can do that easily with the Premium version. You can find the instructions here.
My posts show up in date-order when the page loads, but then when I filter them using Divi Filter, they show out of date order. Is there anyway to make them appear in date order? Thanks!
This is fixed in the new version. In the Premium version: https://shop.danielvoelk.de/product/divi-filter-lifetime/
Or also in the free version: https://danielvoelk.de/en/divi-filter
Hello,
Is it possible to filter whole sections instead of rows or images?
Thanks,
Ondrej
Unfortunately not, but you can achieve the same result by adding the same filter class to all rows in the same section. 🙂